Local IV contrast infiltration

Just imagine this scenario: you are concerned that your patient has a pulmonary embolus. They are tachycardic, hypoxic on room air, but BP’s are stable (for now). They were a tough stick and 2 nurses tried for 5 minutes, so under real time ultrasound guidance you place what you think is an expert 20g x 48mm angiocath in their right cephalic vein. You dial 6308 and ask the radiology technologist to scan the patient next, then you are off to see the next patient on a busy north side shift.

15 minutes later, you get a call: “Ummmm… Doc, patient x…. that line blew. They got the hole load in the right arm. Can you come take a look?”

This can happen about 0.24% of patients who receive IV contrast in the upper extremity (or about 1/400 studies).

UNDERSTANDING CONTRAST:

The Omnipaque™ we use for our IV contrast CT studies is Iohexol:

Here is its structure:

1200px-Iohexol.svg_.png

The concentration we use is 350 mg/mL, this results in a total osmolality of 844 mOsm/kg water. This is approximately 3 times the osmolality of serum. However, given the fact it is non-ionic, it does not cause a significant osmolar effect. Nonetheless, infiltration will lead to fluid shift of H2O down its gradient into the tissue compartment the infiltrated contrast material occupies, which is typically the interstitial space. This has been shown experimentally in a renal model: after contrast load urine output increases because the iohexol is renally excreted.

The most danger for infiltration occurs with high flow rates achieved during CT angiography studies. As per our technologist on our Siemens machine, the auto injector we use has a flow rate 4-5 mL/s achieved with a pressure gradient anywhere from 50-100 psi. If the IV has poor flow due high intracatheter or intravenous resistance, then the pressure can increase to upward of 400 PSI to achieve flow. When this high pressure occurs, the IV can become dislodged. Remember Newtonian mechanics: Pressure exerts a force, and for each force there is an equal and opposite reaction.

MANAGEMENT OF IV INFILTRATION OF A CONTRAST LOAD:

####first and foremost, you need to inform the patient what happened. Explain why this happened. Apologize for the complication. Address any pain issues. Tell them how you and the team will care for their likely painful upper extremity. Finally, you can reassure them for the reasons below.

*Gradually, the infiltrated contrast will diffuse out of the tissue compartment and back into the serum. This diffusion can be enhanced with gentle warm compresses.

**Plastic surgery recommendations for this complication are elevation of the extremity, local massage, and frequent neuromuscular checks.

***In a study of 102 cases of IV contrast extravasation in the upper extermity, surgical intervention was required in 0. The surgeons behind this study recommend surgical consultation if there obvious signs of skin compromise or compartment syndrome.

****compartment syndrome has been reported in the case literature, so please, please, please, watch for that. The incidence is on case report level, so it is likely very, very low.

SOME TIPS PREVENTION OF IV INFILTRATION OF US GUIDED PIV’s:

*Always use the 48 mm angiocath

**The more of the catheter that is in the lumen of the vein, the less likely it is to become dislodged. So a good rule of thumb is at least 1 cm of the catheter within the lumen of the vein. So any target >2cm deep to the skin will be difficult to properly position using a 45 degree angle of approach.

One fun final fact: non-ionic iodinate contrast materials are procoagulants and as per the FDA they should be avoided at all cost patients with homocystinuria.

References:

https://www.accessdata.fda.gov/drugsatfda_docs/label/2015/018956s095,020608s031lbl.pdf

https://www.sigmaaldrich.com/catalog/substance/iohexol821146610895011?lang=en®ion=US

Jonas Pologe’s US PIV POD

Belzunegui T, Louis CJ, Torrededia L, Oteiza J. Extravasation of radiographic contrast material and compartment syndrome in the hand: a case report. Scand J Trauma Resusc Emerg Med. 2011;19:9.

Sbitany H, Koltz PF, Mays C, Girotto JA, Langstein HN. CT contrast extravasation in the upper extremity: strategies for management. Int J Surg. 2010;8(5):384-6.

Solomon R. Contrast media: are there differences in nephrotoxicity among contrast media?. Biomed Res Int. 2014;2014:934947.

Iohexol image curtesy wikipedia public domain, no limitations.

 · 

Ultrasound-Guided PIV Placement Part 2 POD

The following is a powerful advanced technique that can be used to troubleshoot traditional short-axis US-PIV placement.

A familiar scenario: The elusive needle tip!

  • You’re placing an US-guided PIV and going ahead with your short axis technique

  • The vessel is directly under the center of the probe, right on that Bx-guide line

  • You know exactly how deep it is

  • The needle has entered the skin… the tip should be right over or very near the vessel…

  • But where is it??? You’re bouncing the needle a little and see tissue moving, you’re slowly sweeping the probe backward and forward where your needle tip should be, but it continues to elude you! Maybe it’s a little deep, maybe there’s some echogenic (bright) tissue hiding it, doesn’t matter, here’s what to do...

The answer: Long Axis — Hear me out!

  • Take your eyes off of the ultrasound screen

  • Pick up the probe and place it back down, marker toward you, exactly along the axis of the angiocath, DIRECTLY over it!

  • Without moving your hand, look back up at the screen. Unless you’re at a crazy steep angle, you will see your whole needle clearly!

  • If you see the vessel on the screen as well, you are now perfectly set up to continue placing your IV

  • Position the tip in the vessel lumen, then advance the angiocath over the needle as you normally would

Image result for long axis ultrasound guided IV

The other scenario: You’ve positioned the probe over the needle, you look up and see the needle but not the vessel any more, or maybe part of the vessel — here’s what you do

  • Slide/rotate the probe such that you have the vessel in view at its widest diameter on the screen

  • Then LOOK BACK AT THE ARM

  • If the probe is now to the right of the needle, you need to redirect to the right; if the probe is to the left, the needle needs to go left

  • Withdraw the needle a few mm and then redirect so that it is inline with the ultrasound

  • As you do this, look back up at the screen and you should see the needle coming into view

In a nutshell: If you’ve lost your needle tip

1. Use the probe to show you where the needle is

2. Use the probe to show you where the vessel is

3. With the probe over the vessel, position the needle so that it’s directly under the probe

4. Now all three are lined up and you’re ready to position the needle tip in the vessel lumen

A few last tips:

  • You can fine-tune your left-right control of needle tip in long axis by just moving the needle slightly one way or the other and seeing if it comes more into view or less into view — this will start happening automatically if you practice this technique a few times

  • I still recommend letting go of the probe and advancing the angiocath with non-dominant hand, however if an assistant takes the probe when you are ready to advance the angiocath, you can watch it go into the vessel and ensure that it is advancing smoothly into the lumen.

  • You can do this with one person as well but this requires advancing the angiocath and stabilizing the needle with one hand, which is more difficult and gives little tactile feedback as to whether it is advancing smoothly or meeting resistance

  • Once you’re comfortable with this long-axis technique, try doing the entire procedure in long axis. This tends to work very well for deeper, straighter veins.

  • There’s no reason you can’t switch back to short once you’ve found your needle tip and repositioned it; perhaps it’s a twisty vessel with multiple turns and you need to walk it in a little more - short axis is better for navigating in the left-right direction (as long as you’ve located your needle tip!)

  • Remember the concept of "angle of insonation": the steeper your needle angle, the more difficult it will be to see your needle because fewer ultrasound beams are bouncing back to the probe (more are being deflected in a different direction)

Jonas Pologe, PGY3, Emergency Medicine, Maimonides Medical Center

 · 

Superficial Cervical Plexus Block POD

That’s right. Time to talk about my favorite nerve block.

The SCPB

This block is 

quick

and

easy

.

It makes

IJ central lines

painless procedures

.

It also provides excellent analgesia for

clavicle fractures

,

ear lobe lacerations

,

blind subclavian lines

, or

anything within this quadrilateral

:

boundries.jpg

How to do it

Find the

posterior aspect of the sternocleidomastoid (SCM) muscle

.

Position the probe half way down the SCM as you measure it from mastoid process to clavicle.

About at the level of the superior aspect of the thyroid cartilage, also about where the EJ crosses over the sternocleidomastoid.

land-marks-jpeg.jpg
with-probe-jpeg.png

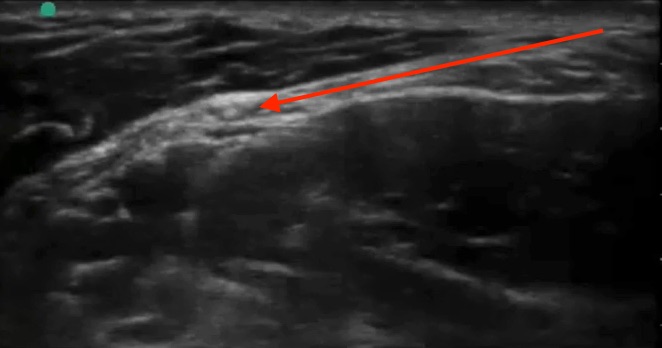
The fascial plane under the posterior aspect of the sternocleidomastoid muscle is your target.

just-sono-arrow.jpg

Like other

plane blocks

 you are not targeting any one nerve in particular. By infiltrating this tissue plane, you get the superficial plexus as it peeks out from behind the SCM at this level:

PastedGraphic-2.tiff

Inject 5-10 cc of local anesthetic.

Ensure it is spreading in the plane like this.

1.jpg
2.jpg
3.jpg

Safety:

  • As with all ultrasound guided nerve blocks, visualize your needle tip always, especially prior to injection.

  • When you begin injecting, inject one mL only to ensure you see it spreading in the fascial plane. Then inject the rest.

  • Withdraw before you inject if there is even a slight possibility you are close to a vessel

  • Throw some color on your site to ensure you identify any vessels.

  • In general this is a very well tolerated and forgiving block.

  • The incidence of phrenic nerve involvement is extremely low with SCPB, far lower than with the interscalene block. Phrenic nerve involvement will be avoided if ensure you don’t go too deep - a few cm, or about half way down the deep edge of the SCM. Going deeper than this results in a deep cervical plexus block which will result in some motor and sensory blockade of the arm.

  • Horner’s syndrome is a rare and self-limiting complication.

  • The amount of local anesthetic used in this block is nowhere near close to toxic levels, so local anesthetic systemic toxicity will not occur as long as you manage to avoid the IJ and carotid.

Tips and troubleshooting

  • For a central line, you can set up, gown, drape, and set up your ultrasound like usual, then use the 5 cc lidocaine which come in the central line kit for your block. Place the block first, then flush your line/lay out your equipment, and your patient will likely be completely numb by the time you’re ready to start your line placement.

  • The other option is to place your block while you’re doing your pre-scan. This way you can use 5-10 cc, but you have to get it out of the Pyxis. Just clean the probe and the skin with a chlorhexidine swab and use sterile gel.

  • If it’s your first time doing a block, consider doing it as a 2 person block. Use some IV extender tubing and have another provider operate the syringe for you. I like slightly longer tubing than typical IV tubing, e.g. the one below. At Maimo, you can find it in the stock room between North and South sides, top shelf straight ahead when you first walk in.

  • Can't visualize your needle? Make sure your ultrasound probe is directly above it and in-line with it. Next, make sure it is as close to parallel to the surface of the probe/perpendicular to the ultrasound beams as possible. If you are approaching a 45 degree angle, your needle will be close to invisible. At close to a 0 degree angle, it will shine like a laser beam.

  • You can use the 27 gauge needles to make it more comfortable but they are a little harder to see.

Further reading and references:

http://highlandultrasound.com/superficial-cervical-plexus-block/

 - Highland crushes nerve block education with their website and their SCPB page is no exception

https://www.ultrasoundpodcast.com/2015/03/superficial-cervical-plexus-block-with-bedsidesono-trust-us-this-is-really-awesome-foamed/

 - Mike and Matt of ultrasound podcast also did an amazing episode on this where many of the images in this tutorial are from

https://www.nysora.com/cervical-plexus-block

 -

Another good resource

 ·